In order to test credit card payments with Authorize.net, you can need to create a testing account.
All you have to do is sign up for a test account: https://developer.authorize.net/testaccount/.
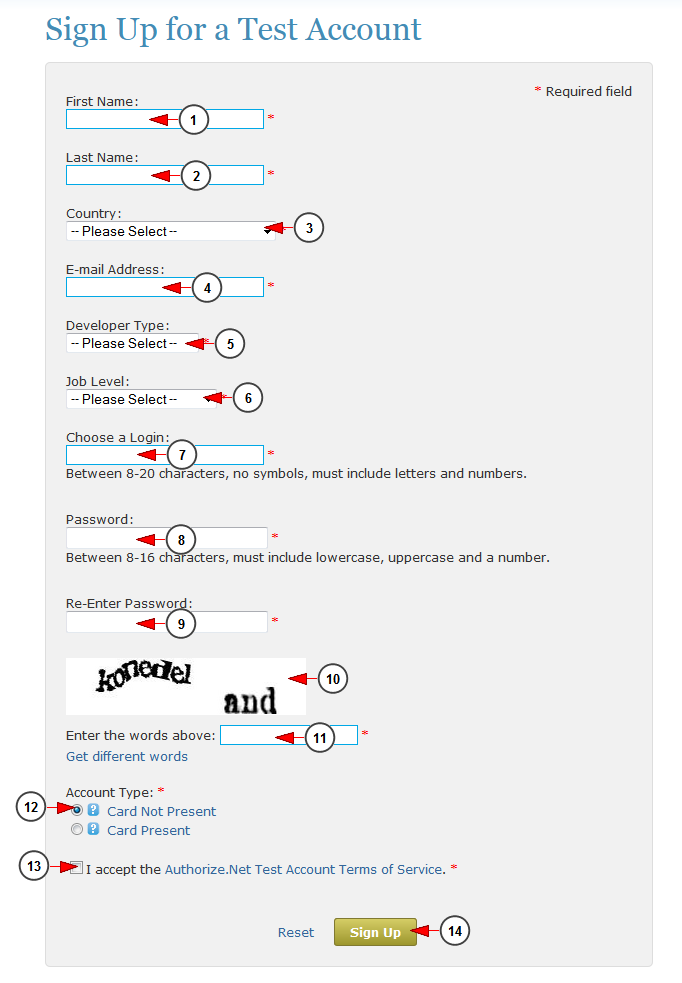
You have to complete a sign up form:
1. Insert here your first name
2. Insert here your last name
3. Select your country from the drop-down menu
4. Insert your email address here
5. Select your developer type from the drop-down menu
6. Select your job type from the drop-down menu
7. Insert here your login username
8. Type your account password here
9. Re-type your account password here
10. Here you can see the verification code
11. Type here the verification code you see above
12. Check the radio button for the Card not present account type
13. Check this box to agree with the terms and conditions
14. Click here to sign up for a testing account
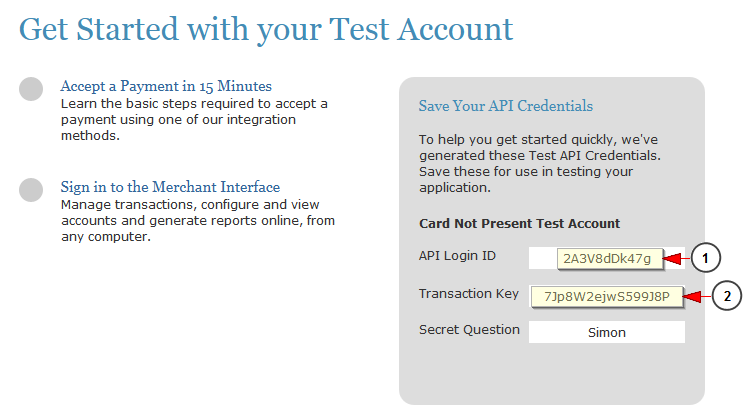
After you submit your form, you will be provided your test API Credentials:
1. Here you can see the testing API login key
2. Here you can see the transaction key
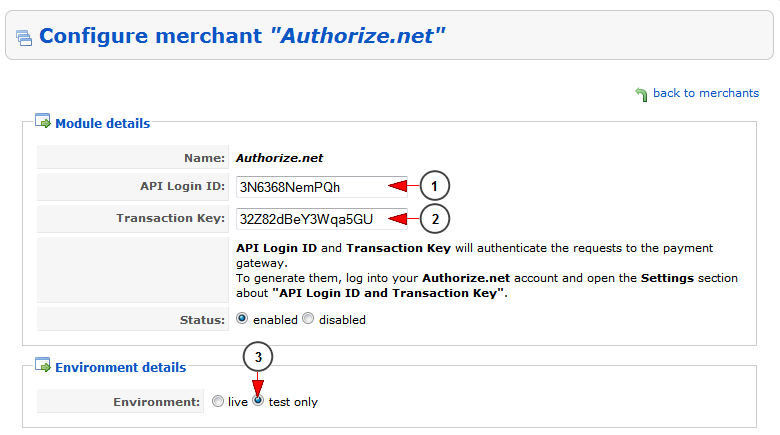
Insert the testing API credentials in Configure merchant page:
1. Insert here the testing API login key
2. Insert here the transaction key
3. Check this radio button to select the testing environment
Once your testing account is configured you can start testing credit card payments.
To access your test account using the Merchant Interface, go to https://test.authorize.net/ and log in using the Login ID and Password you created when requesting your test account.


