In order to set up your Google Analytics Api which will gather the data displayed on Social Reach map, you need to take the following details from your Google account and insert them in platform admin dashboard:
Please follow the steps described in this manual page to properly configure the Google Analytics API.
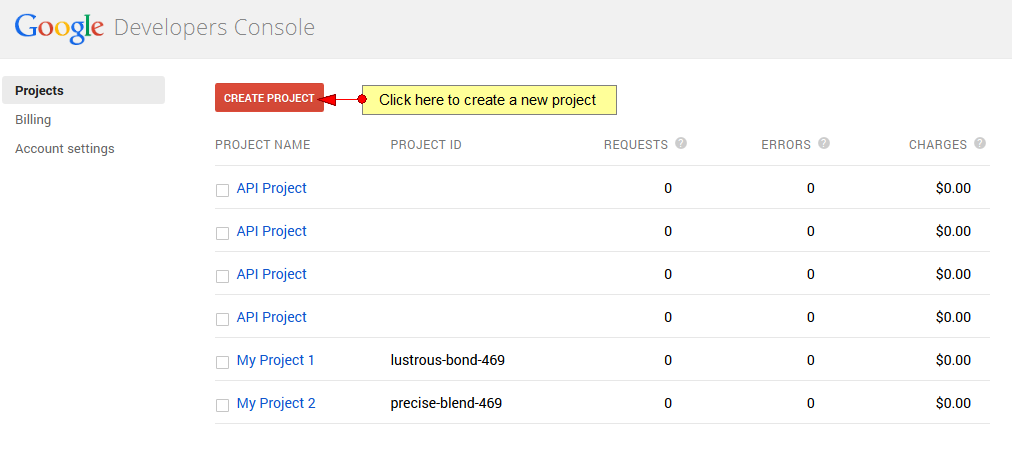
I. The first steps is to log in Google Developers Console and create a new project:
Note: sometimes Google requires your account verification and you can select the method: using your telephone number or email address.
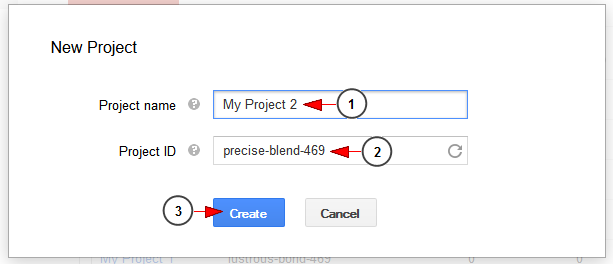
After your Google account is verified you can create a new API project:
1. Insert here a name for your project.
2. After you inserted the project name the project ID will be automatically displayed.
3. Click Create button to save the new project.
II. After you created a new project, you need to turn on the Analytics data API:
1. Click on APIs link to open the page.
2. Click on the OFF button, to turn on Analytics API.
III. The next step is to create a new client ID:
1. Click on Credentials link to open the page.
2. Click on Create a new client ID button.
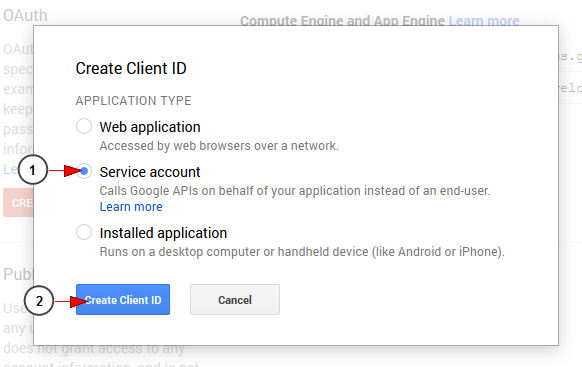
An overlay window will be displayed and you need to select the application type:
1. Check this radio button to select service account client ID.
2. Click Create client ID.
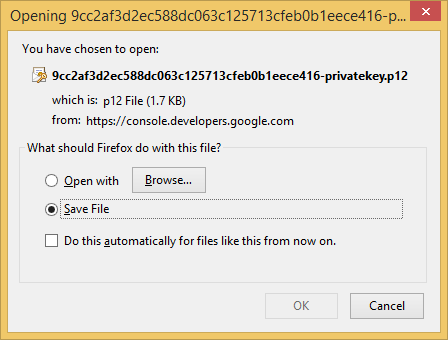
A new pop-up window will be displayed and you need to save the file which contains the private key:
After you saved the file in your computer you can upload it in your admin dashboard:
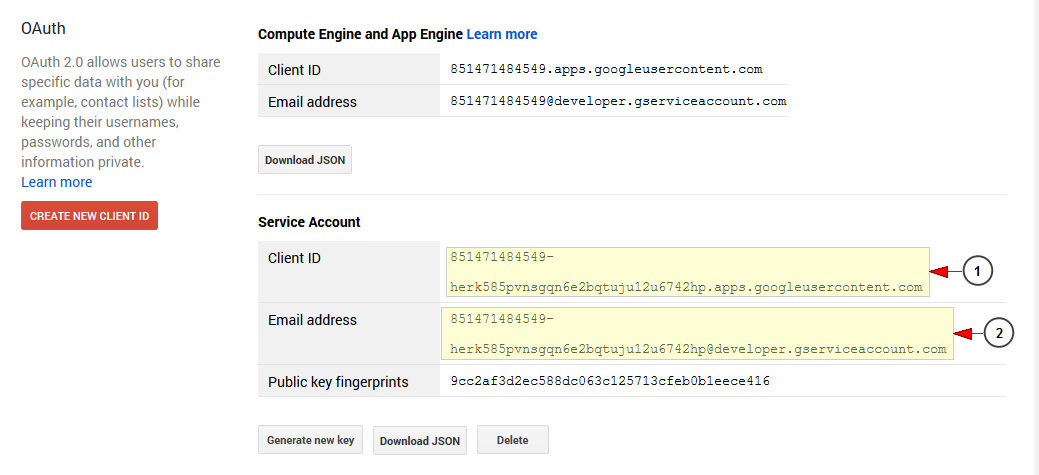
IV. Once your client ID is created, the service account details will be displayed and you can copy the client ID and email address:
1. Here you can see the Google Api client ID
2. Here you can see the Google Api email address.
Copy the codes from the API access page into your website Site Settings page:
1. Insert here Google API email address.
2. Insert here secret Google API ID code.
V. The next step is get your Google API Profile ID. This ID can be found on Google Analyitcs page.
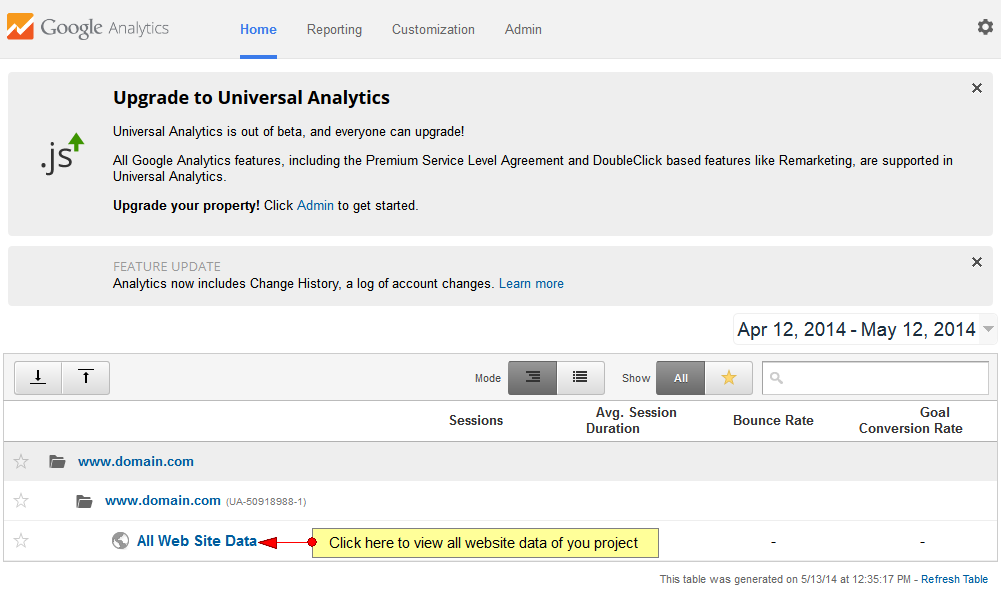
After you log in your Google Analytics account, you can either create a new project or click on the name of an existing project to view all website data:
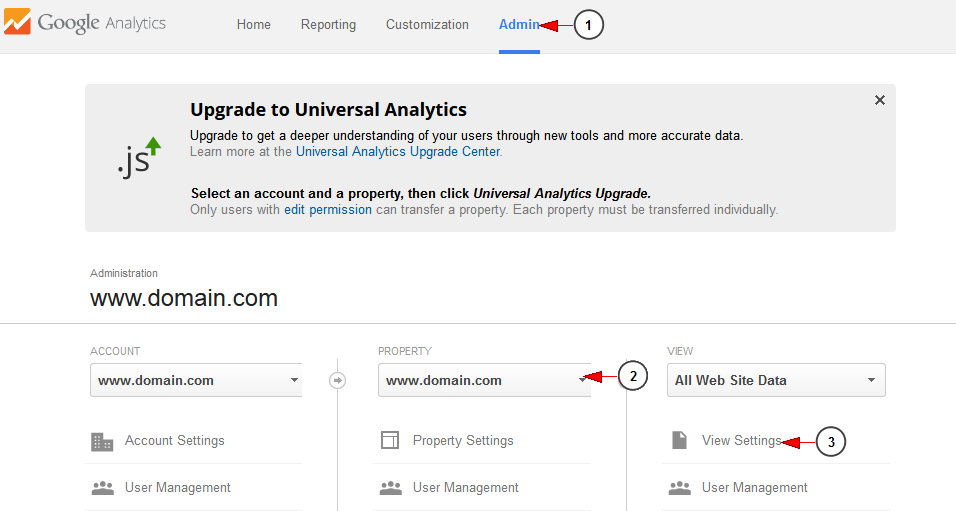
The next step is to view the project data as administrator:
1. Click on Admin button to view the administrator settings page.
2. Select from the drop-down menu the project for which you want to view the settings.
3. Click here to view all settings for the project.
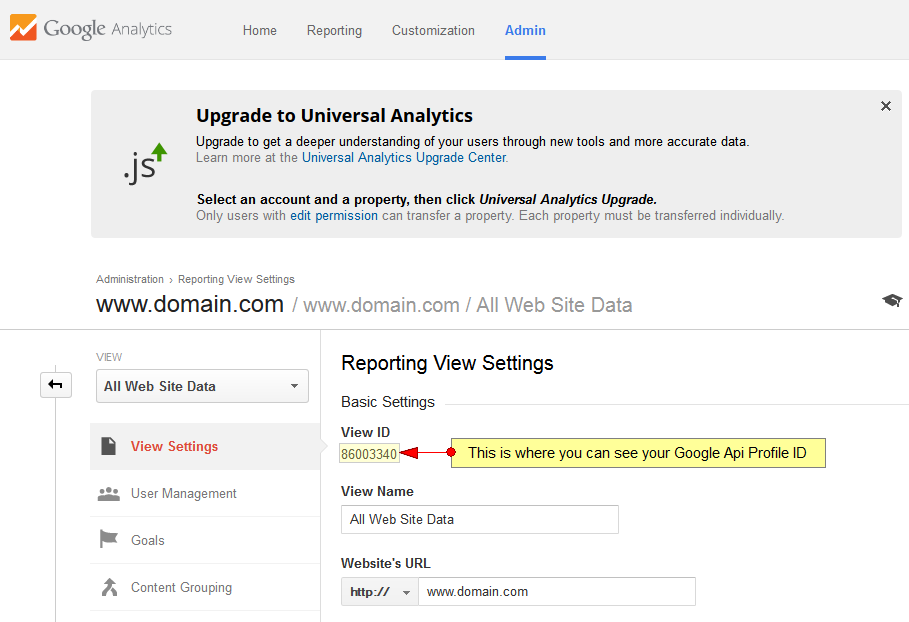
On admin settings page you will be able to view your profile ID:
Copy the Google API profile ID and paste it on your admin dashboard:
Note: when you insert the profile ID code, type “ga:” text before the code.
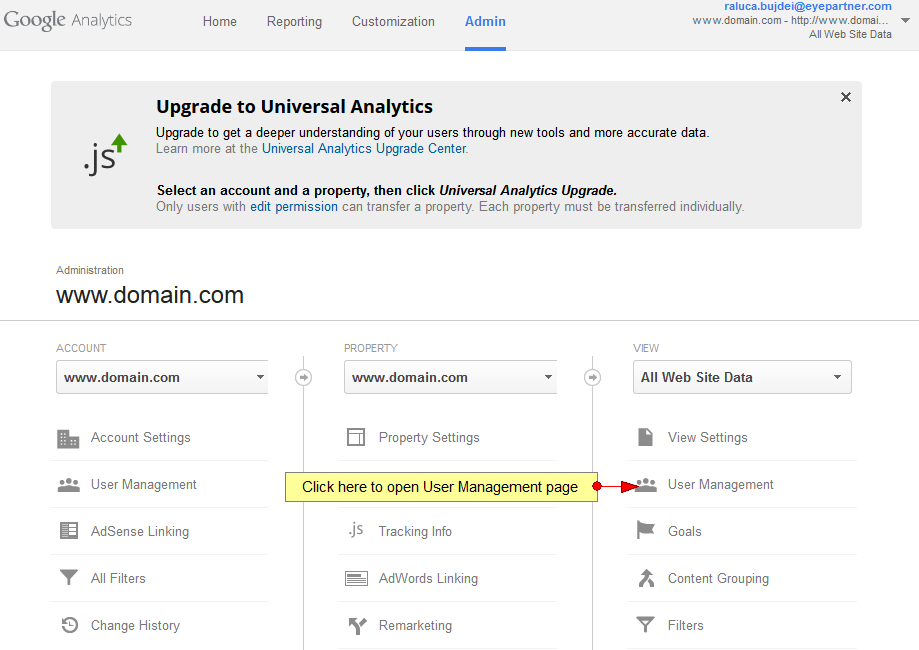
VI. You also need to enable the permissions for the user to have access to Google Analytics. In order to do that, go to Users Management:
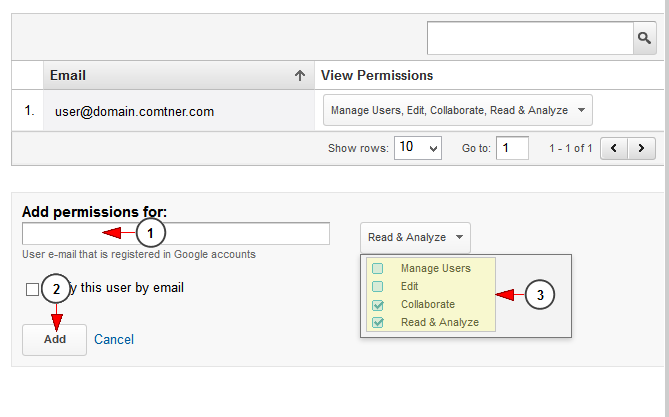
Once the page opens you need to insert the Google email address and check the permissions:
1. Insert here the Google API email address.
2. Click here to add the permission for the email address.
3. Check the desired permissions.
Note: Collaborate and Read& Analyze permissions must be checked.


