The website administrator can enable or disable WordPress requests functionality, from Platform Customization page.
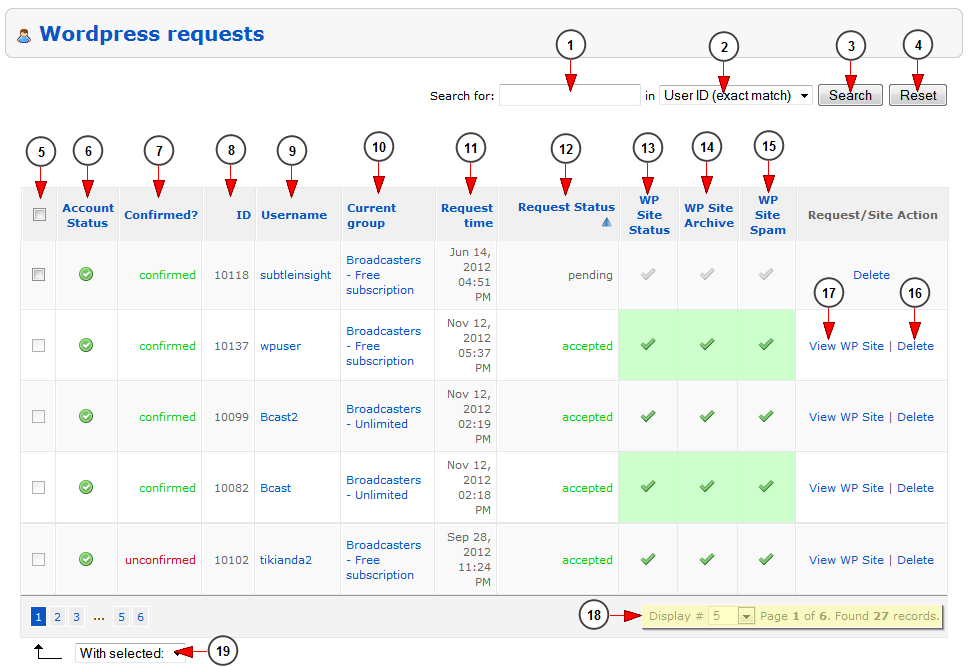
If WordPress requests are set to be revised by the administrator, all requests will be displayed in WordPress requests page:
Click on the WordPress Requests page in Users & Groups chapter and the following page will open:
1. Insert here the search items.
2. From this drop-down menu you can select where you want to search: in user’s ID or user’s username.
3. Click here to search for desired item.
4. Click here to reset the search results.
5. Check this box to select the requests you want to accept or deny. The requests once accepted cannot be denied afterwards.
6. Here you can view the user’s account status.
7. Here you can see if the user’s account is confirmed or not.
8. Here you can view the ID of the user.
9. Here you can view the user’s name. If you click on the username, you will be redirected to the edit user page.
10. Here you can view the group which the user belongs to. If you click on the group name, you will be redirected to the edit group page.
11. Here you can view the time when the WordPress request was made.
12. Here you can see the request status: accepted, denied or pending.
13. Here you can see the WordPress site status: enabled or disabled.
14. Here you can see the WordPress site archive: enabled or disabled.
15. Here you can see the WordPress site spam; click on the accept sign to spam the user’s site.
16. Click here to view the user’s WordPress blog.
17. Click here to delete the WordPress blog and any of its activity.
16. Here you can view the status of the request: accepted, denied or pending (waiting for approval).
18. Click on the drop down list to select the number of items you want to view displayed on the page.
19. From this drop-down menu you can select to accept or deny the selected requests.


