Logged in your admin account, click on Users signups link, under Reports menu:
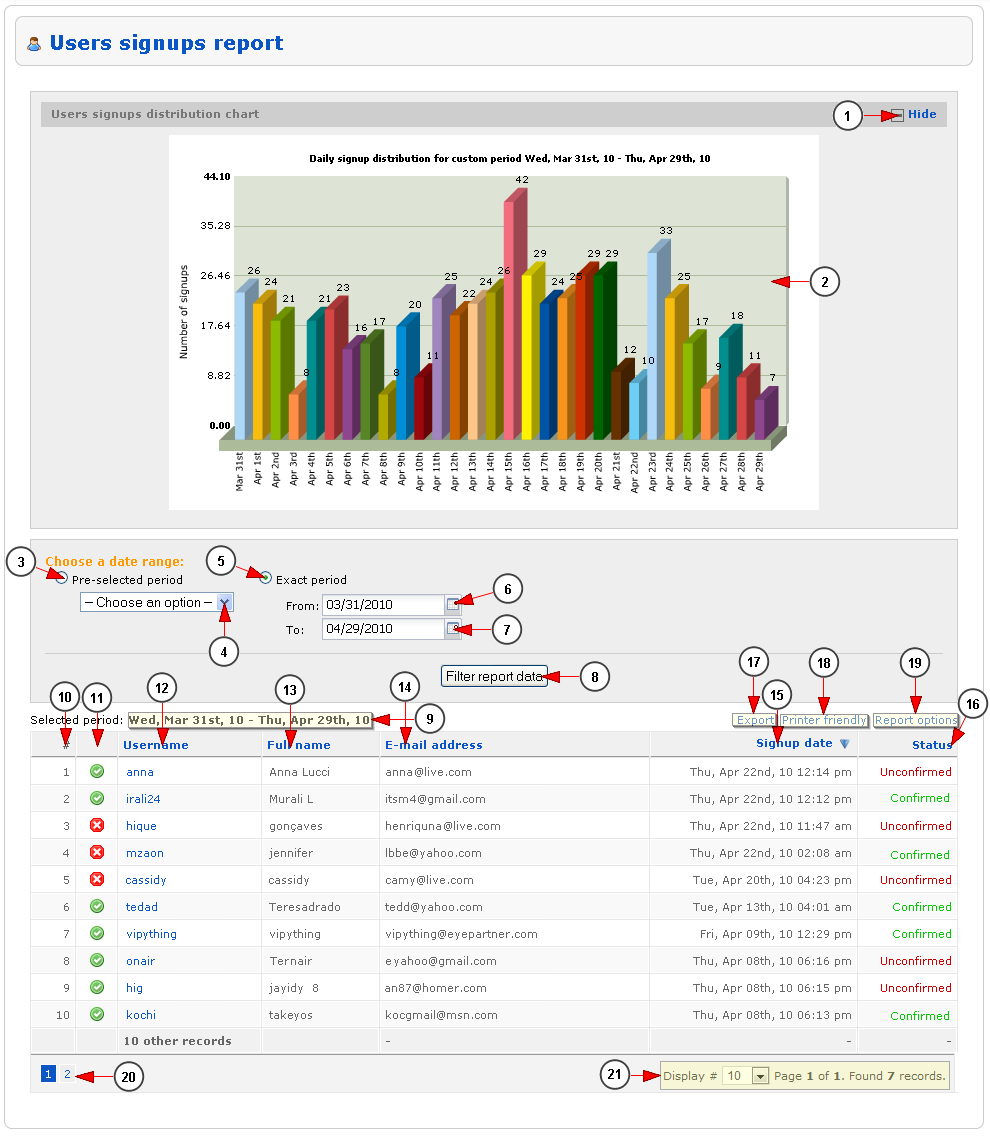
Here you can view the statistics for the signups made on your system:
1. Click here to show/hide the Users sign-ups distribution chart.
2. Here you can view the daily signup bar graph for the selected period of time.
3. Check this radio button if you want to view the report for a pre-selected period of time.
4. From this drop-down you can select the pre-selected period of time for which you want to view the report.
5. Check this radio button if you want to view the report for an exact period of time.
6. Click here to open the calendar and select the start date for reports.
7. Click here to open the calendar and select the end date for reports.
8. Click here to view the reports for the selected period of time.
9. Here is listed the period of time for which the reports are listed.
10. Here you can view the ID of the user.
11. Here you can view the status of the user account.
12. Here you can view the username of the user.
13. Here you can view the full name of the user.
14. Here you can view the name of the email address of the user.
15. Here you can view the date when the user registered into the system.
16. Here you can view the status of the user account: confirmed or unconfirmed.
17. Click here to export the report into a CSV file format.
18. Click here to view the print format of the report – it will be opened into a pop-up window.
19. Click here to adjust the report options.
20. Here you can view the pagination index.
21. Here you can see the pagination index, the number of items found and you can select how many records you want to see displayed on the page.
Calendar
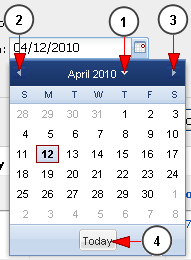
If you click on the calendar icon, the pop-up calendar will open and you will be able to select the date:
1. Click here to view the month and year part and select the desired month and year.
2. Click here to go to previous month.
3. Click here to go to next month.
4. Click here to go to current day.
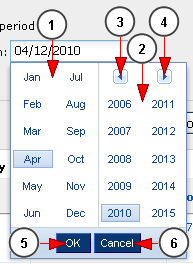
If you click on the arrow from previous point 1 (the arrow near year), you will be able to select the month and the year for the reports period:
1. From here you can select the month.
2. From here you can select the year.
3. Click here to view the years before 2006.
4. Click here to view the years after 2015.
5. Click here to select the highlighted month and year.
6. Click here to close the pop-up calendar.
Export Reports
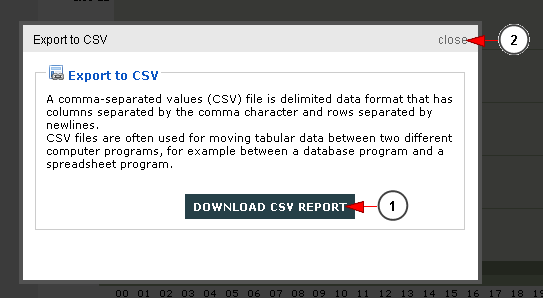
If you click on the Export link, a pop-up window will open and you will be able to download the reports into a CSV file format:
1. Click here to download the CSV file with the listed reports.
2. Click here to close this pop-up window.
Printer Friendly Reports
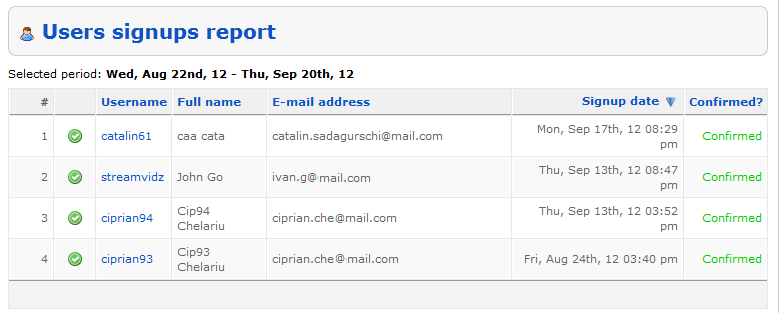
If you click on the Printer Friendly link, a pop-up window will open with the reports listed so you can easily print the page:
Report Options
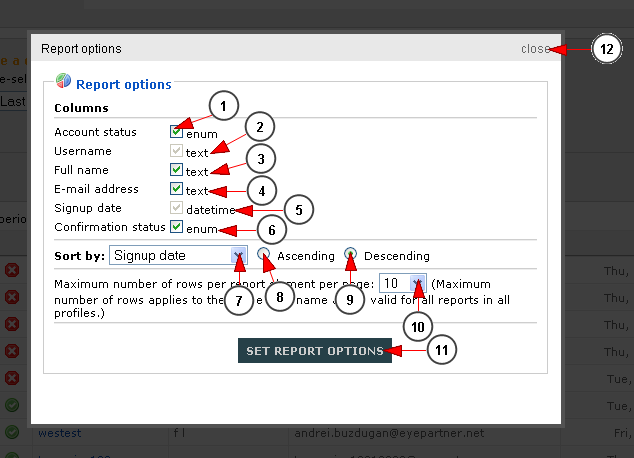
If you click on the Report Options link, a pop-up window will open and you will be able to manage the columns that will be listed on the reports page:
1. Check this box if you want to list the status of the user account.
2. Check this box if you want to list the username of the users – this option is set as enable by default and you can’t modify it.
3. Check this box if you want to list the full name of the users.
4. Check this box if you want to list the email address of the users.
5. Check this box if you want to list the date when the users registered into Streaming platform system – this option is set as enable by default and you can’t modify it.
6. Check this box if you want to list the account confirmation status.
7. From this drop-down menu you can select to sort the reports by: user ID, username, email address, first name, signup date, confirmation status.
8. Check this radio button if you want to list the reports in ascending mode.
9. Check this radio button if you want to list the reports in descending mode.
10. From this drop-down menu you can select how many rows will be listed on page.
11. Click here to save the report options.
12. Click here to close this pop-up window.


