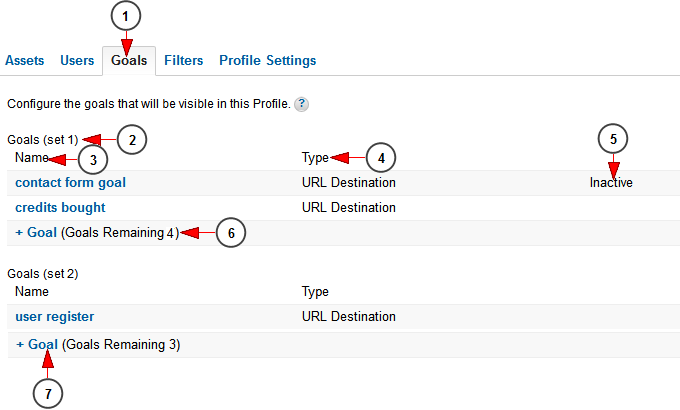
Once logged into Analytics dashboard, click Admin, and navigate to the desired view. In the VIEW column, click Goals.
On Goals page you can measure how well you meet individual objectives. You can set up to 5 goals per set (four available sets)
1. Click here to manage the goals for your account
2. Here you can see the goal set number
3. Here you can see the name you set for the goal
4. Here you can see the type of the goal: URL destination, Visit duration, Page/Visit (for web) Screens/Visit (for apps), Event
5. Here you can see the inactive goals
6. Here you can see the remaining number of goals you can set
7. Click here to add a new goal
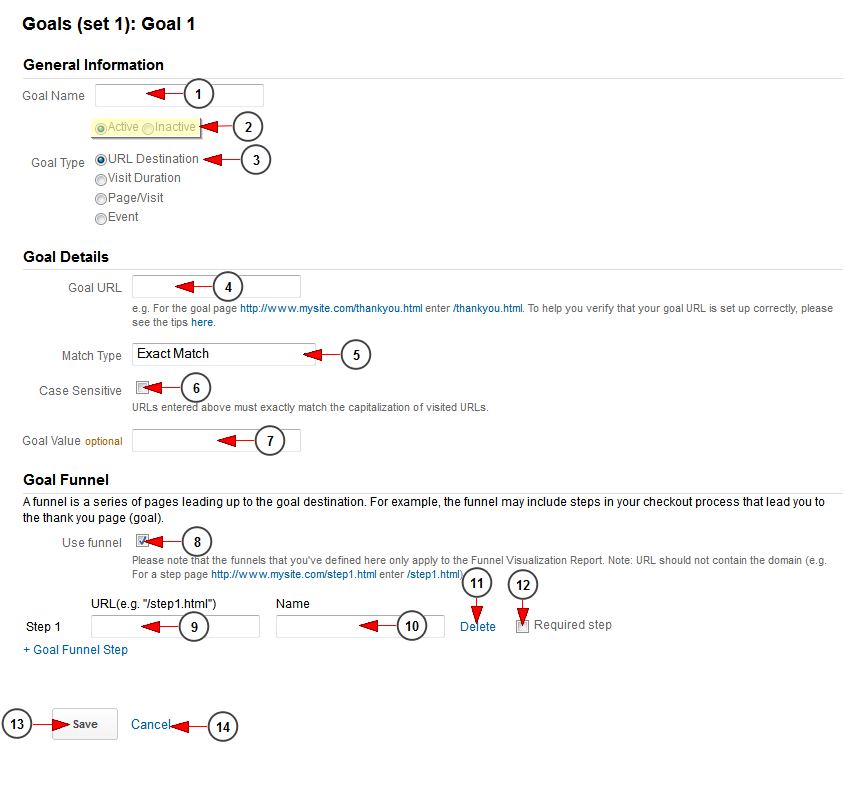
Add new Goal set
1. Type here the name of the goal
2. Check Active radio button if you want the Goal to apply as soon as you create and save it or check Inactive if you want to create the Goal without applying it to your account
3. Check the radio button according to the type of goal you want to set. In picture above we selected URL destination as an example
4. Type here the goal URL (e.g.: /finish_goal.html)
5. Select the desired match type
6. Check this box if you want the URLs entered above must exactly match the capitalization of visited URLs
7. Insert here a goal value if you want
8. Check this box to use a funnel (a series of pages leading up to the goal destination) for your goal
9. Insert here the URL of the first funnel page (e.g.: /step1.html)
10. Type here the name of the page
11. Click here to delete the funnel page
12. Click here to make this page a required step for your goal page
13. Click here to save the goal
14. Click here to cancel the goal settings
Note: We have explained into this TikiLIVE manual page the basic items that you can use form Google Analytics. You can check the Google dedicated page related to Analytics Help for a more detailed functionality.


