In order to view your audio playlists, you will have to click on Audio Manager button from the left side of the Dashboard area:
After the Audio Manager menu tab opens, you will have to click on the My Audio Playlists link:
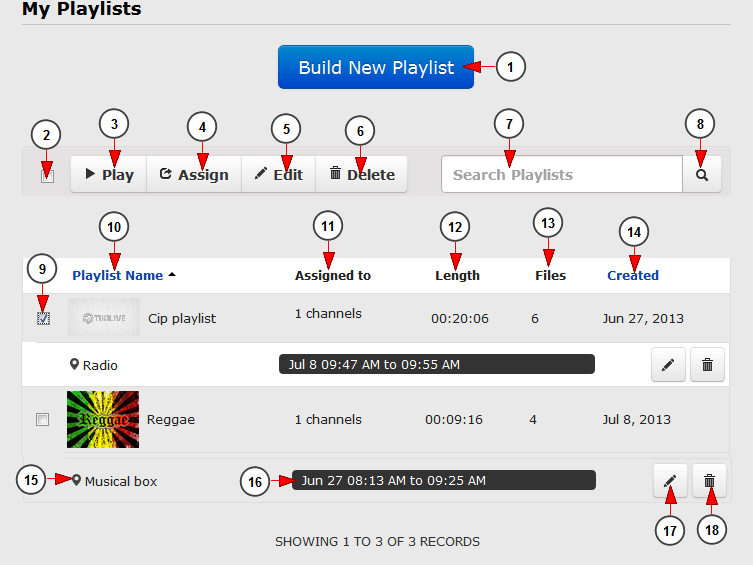
This is how My Audio Playlists page looks like and below we will explain each field:
1. Click here to create a new audio playlist
2. Check this radio button to select the all the available playlists
3. Click here to play the selected playlist
4. Click here to assign the playlist to a radio channel
5. Click here to edit the selected playlist
6. Click here to delete the selected playlists
7. Insert here the title of the playlist you want to search
8. Click here to search the desired playlist
9. Check the box to select a playlist
10. Here you can see the name of the playlist
11. Here you can see the number of radio channels, the playlist is assigned to
12. Here you can see the length of each playlist
13. Here you can see the number of files in each playlist
14. Here you can see the date when the playlist was created
15. Here you can see the name of the radio channel which has the playlist assigned to
16. Here you can see the date when the playlist was scheduled to play on the radio channel
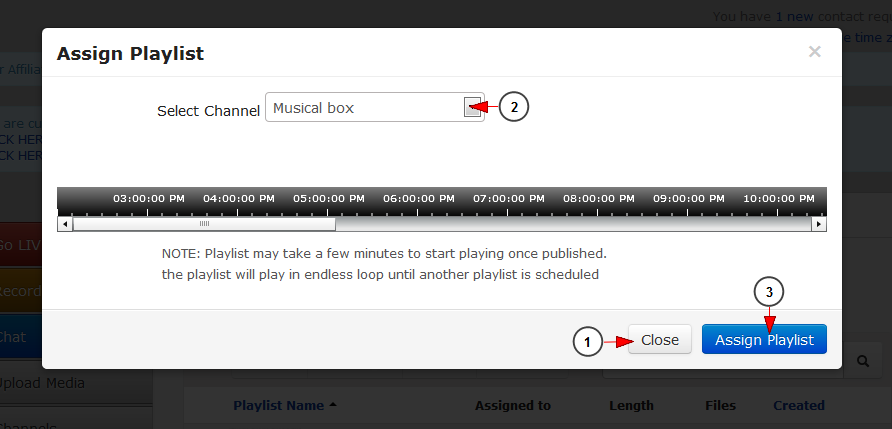
17. Click here edit the playlist assignment. An overlay window will be displayed as you can see in the picture below
18. Click here to delete the playlist assignment
Playlist assignment
1. Select from the drop-down menu a radio channel which you want to re-assign the playlist to
2. Click here to close the overlay window
3. Click here to assign the playlist to the selected radio channel


