Users who have the permission enabled can add sub-users and manage their account settings as an administrator. This feature allows users to share their content and to build a common database. Sub-users can have the same right as their administrator and manage the account settings.
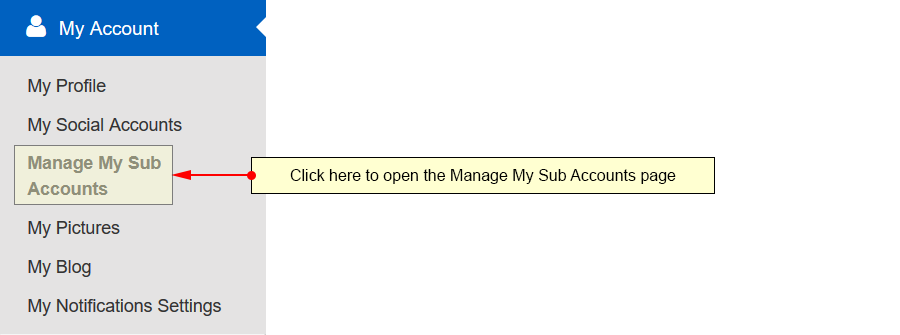
Logged in your user account, click on the Manage My Sub Accounts link, under the My Account chapter:
On Sub Users management page, you can add new users, edit existing ones, import users or export them:
1. Click here to add a new sub-user.
2. Click here to open the drop-down menu and select to import or export users.
3. Click on the drop down list and select to sort the sub-users after: username, ID, sign-up date, last login date or status.
4. Check this radio button to view the sub-users listed in ascending mode.
5. Check this radio button to view the sub-users listed in descending mode.
6. Click here to start the search of the sub-user or you can press the ENTER button on the keyboard in order to start the search.
7. Type here the username or the email of the sub-user.
8. Here you can select the sub-users accounts you want to enable or disable.
9. Here you can see the ID of the sub-user account.
10. Here you can see the username of the sub-user. If you click on the username you will be redirected the sub-user profile page.
11. Here you can see the first name of the sub-user.
12. Here you can see the last name of the sub-user.
13. Here you can see the sub user sign-up date.
14. Here you can see the date of the sub-user’s last login.
15. Here you can see the status of the account: enabled or disabled.
16. Click here to edit the sub-user details.
17. Click here to login as the sub-user.
18. Here you can see the pagination index and you can use the arrows to move from one page to another.
19. Click here to enable or disable the selected sub-users.
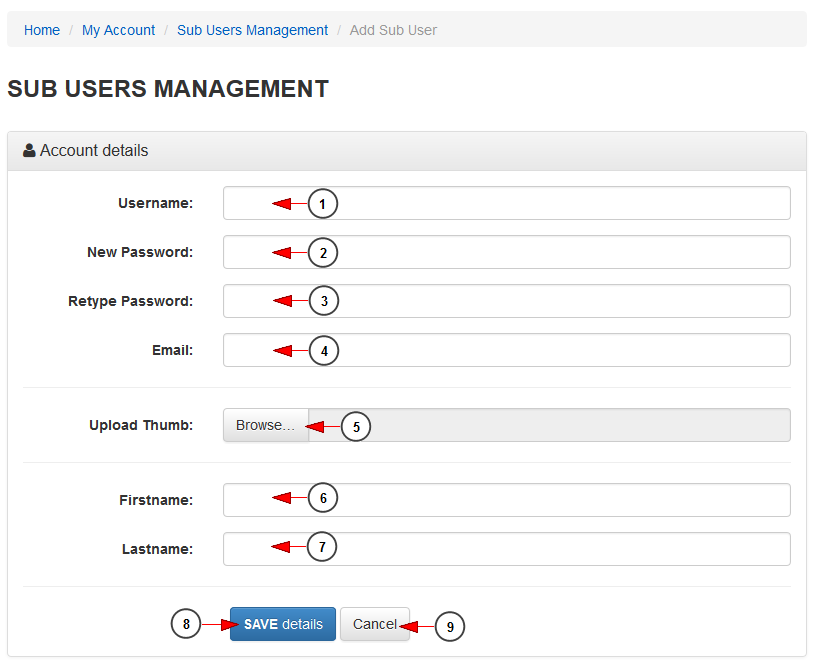
Add new sub-user
1. Insert here the username of the sub-user.
2. Insert here a password for the account.
3. Re-type the password in this field.
4. Type here the sub-user’s email address.
5. Click here to browse a picture in your computer in order to uploaded as the sub-user’s thumbnail.
6. Type here the sub-user’s first name.
7. Type here the sub-user’s last name.
8. Click here to save the sub-user account details.
9. Click here to cancel adding a new sub-account.
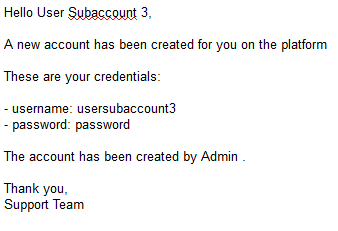
Note: once the account created, the sub-user will receive an email confirmation with his credentials and the user who created the sub account, as you can see in the following picture:
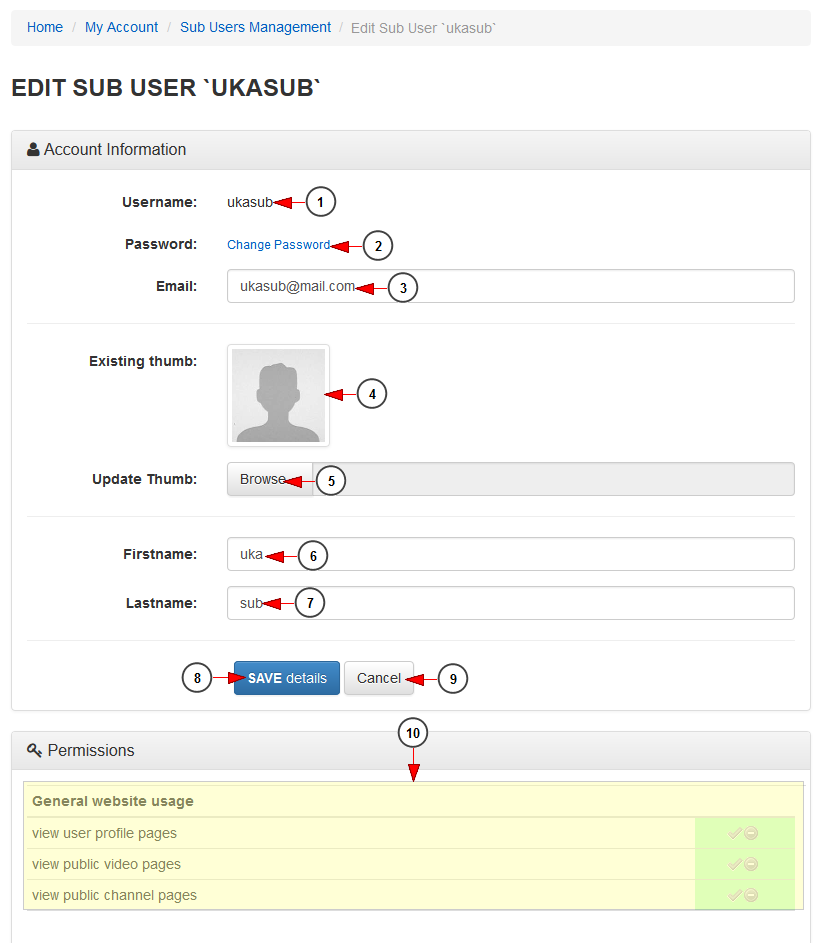
Edit user sub-account
1. Here you can view the username of the sub user.
2. Click here to change the password.
3. Here you can view and edit the sub user’s email address.
4. Here you can view the thumbnail of the sub user.
5. Click here to upload a picture from your computer in order to update the thumbnail.
6. Here you can view and edit the sub user’s first name.
7. Here you can view and edit the sub user’s last name.
8. Click here to save the details.
9. Click here to cancel editing user sub-account.
10. Here you can see listed the permissions the sub user has. You can enable or disable them according to your wish , by click the “approve” or “deny” signs.
Note: these permissions may differ for each sub user, according the permissions of the main account user.
Import users
1. Click here to upload a CSV file from your computer.
2. Click here to import the users from the CSV file.
3. Click here to cancel importing users.
Export users
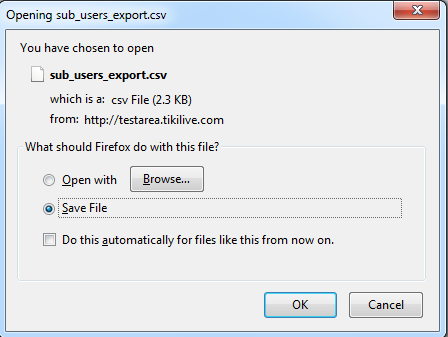
When you click on export users button the following pop up window will appear:
The CSV file with all sub-accounts details will be saved in your computer.

