In this manual page we will explain you how to publish your APK on the Android Play store. The steps that you need to follow, after the TikiLIVE team will provide you the Android APK are listed on this manual page.
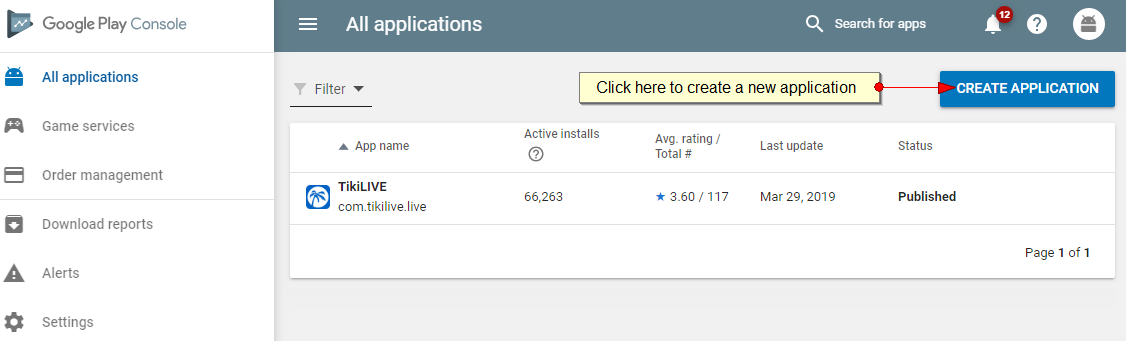
Access your Google Developer account play.google.com/apps/publish/ and from the menu select the “All Applications” option. There you will have to click on “Create Application” button:
A pop up will be shown to ask you to introduce the Default Language and the Title of the APP that you want to publish.

Now you will have to add the details of the application:

1. Here you can view the language of the application for which you are adding the details
2. Enter here the title of the application
3. Enter here the short description of the application that you are publishing – this is a limited 80 characters preview field
4. Enter here the full description of the application that you are publishing – this is giving you space for an up to 4000 characters long app description
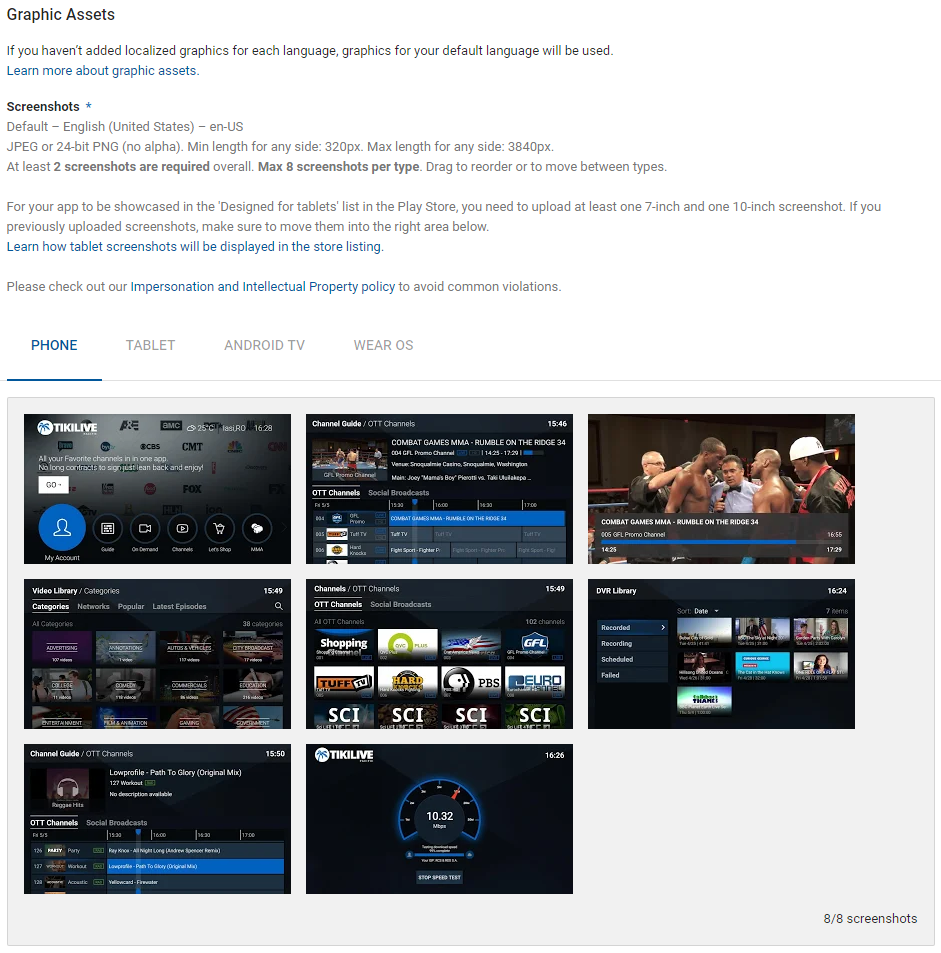
After you entered the application details you have to upload the screenshots for your application; we recommend you yo take the screenshots directly from the device 9phone or tablet) and upload them on the Google Play Store developer account – this way you are sure to have the images at the required size:
After you finished with the screenshots it is the time to add the icons for your application:
![]()
1. Here you will upload the icon of your application – the file should be 512 x 512 and a 32bit PNG
2. Here you will upload the feature graphic image of your application – the file should be 1024w x 500h and JPG or 24 bit PNG
3. Here you will upload the promo graphic image of your application – the file should be 180w x 120h and a 24 bit PNG
4. Here you will upload the TV Banner image of your application – the file should be 1280w x 720h and a 24 bit PNG
The next step is to set the categorization of the application:
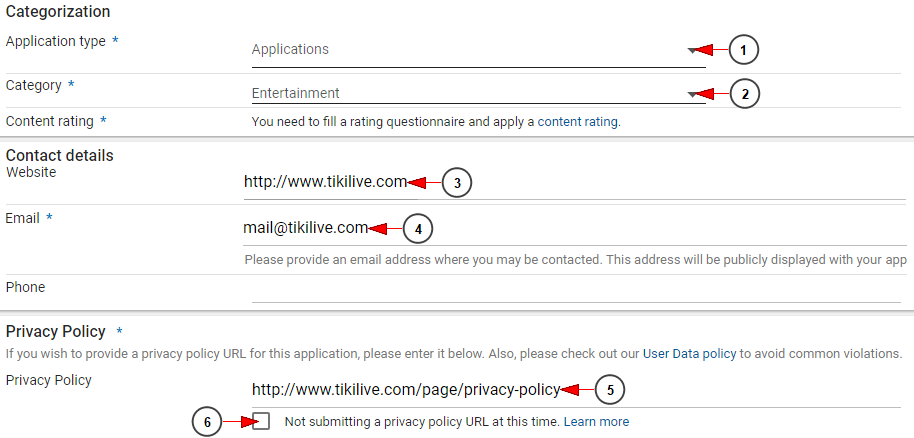
1. Select from the drop-down menu the type of the application
2. Select from the drop-down menu the category to which your application belongs
3. Enter here the website of your application
4. Enter here the email address where you can be contacted – this email will be publicly displayed on your app page
5. Enter here the link from your website where you have the Privacy Policy published
6. Check this box if you don’t want to submit a privacy policy url
On the next step you will upload the APK file and provide the details of the release:

1. Click here to browse for the application file – here you will upload the APK file provided by our developer
2. Enter a suggestive name for the release that you are uploading – this is an internal note for you to know the differences between the releases
3. Enter here the notes regarding the new release of your application
4. Click here if you want to discard all changes for this application – all the data you have entered will be lost
5. Click here to review the new application release
6. Click here to save the details that you entered for this release
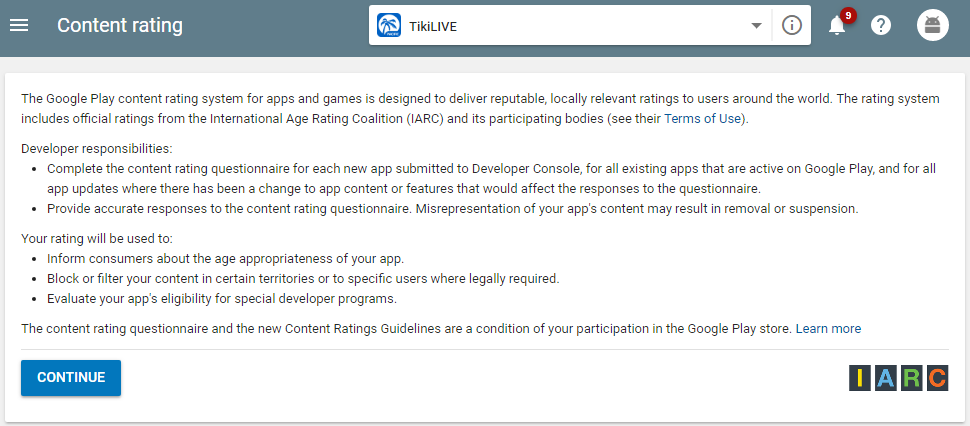
The next step is to set the content rating of the application:
Click on Continue button to select the Pricing & distribution details
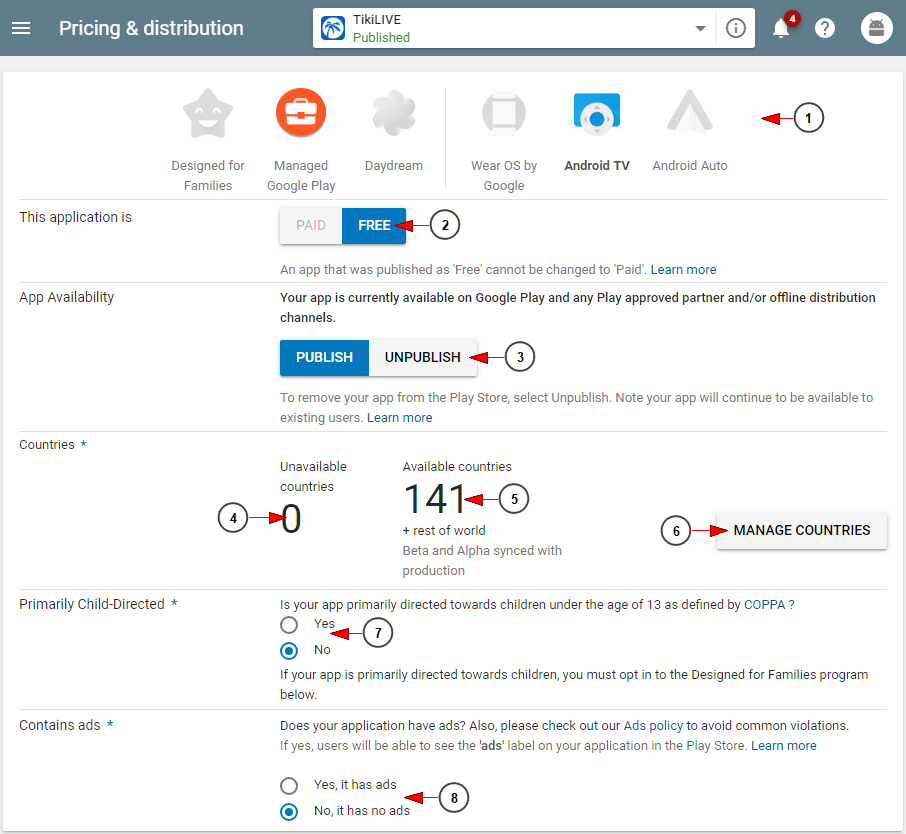
1. Here you can view the platforms where the application will be published
2. Here you can view if the application is Free or paid – you can change this by clicking on the desired button
3. Here you can view if the application is published or Unpublished – you can change this by clicking on the desired button
4. Here you can view the number of countries where the application is unavailable
5. Here you can view the number of countries where the application is available
6. Click here to manage the countries where the application will be available or not
7. Check the corresponding box if your app is primarily directed for children under the age of 13 – the option for the TikiLIVE application is NO
8. Check the corresponding box if your app is having ads or not – the TikiLIVE application does not have ads
On the next step you will select the category of devices that will be able to use the application:
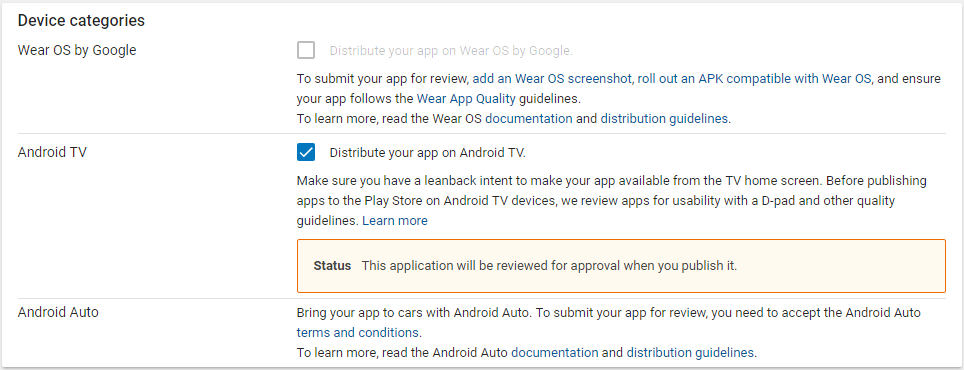
In our case the TikiLIVE application is available on the Android TV only.
The last settings are for User Programs (which does not apply for TikiLIVE applications) and the Consent:
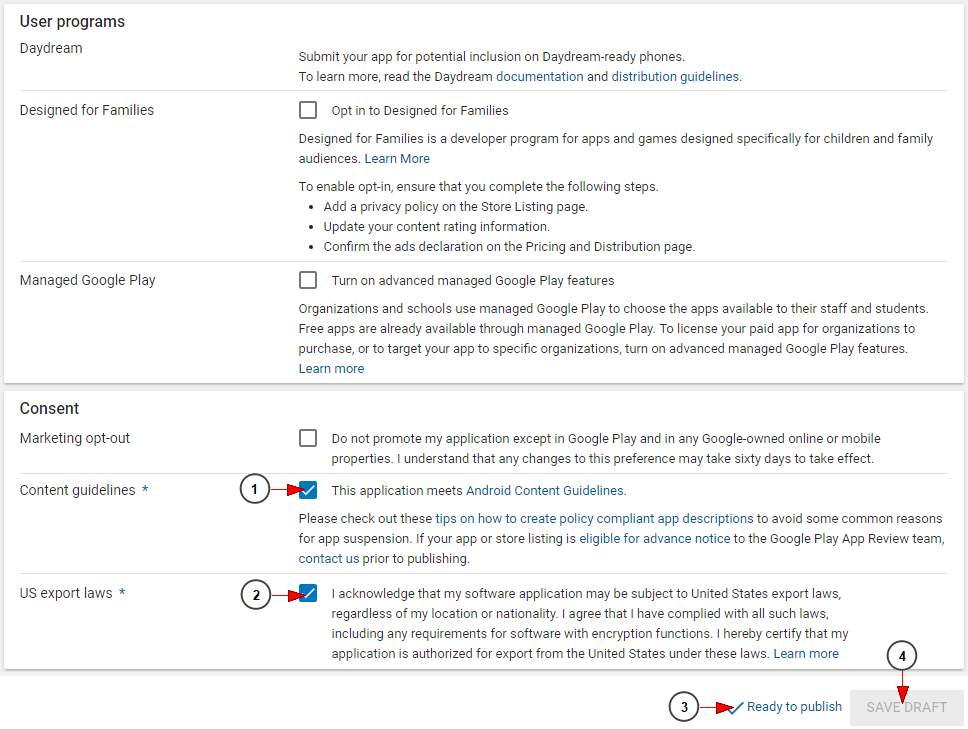
1. Check this box to confirm that the application meets the Android Content Guidelines
2. Check this box to confirm that you acknowledged the subject to United States export laws
3. Here you can view if the application is ready to be published
4. Click here to save the details and settings performed on the application
After you published the application there may be a small delay on having it displayed on the Play Store – this is due to Google Play Store’s cache and it is out of our control.
If you want to update an existing application, then the steps are the following ones:
1. Login on Android Play Store portal: https://play.google.com/apps/publish/
2. Click on the application which you want to upgrade
3. Navigate to Release management – app release
4. Click on Production management – Create release
5. On the add new release window upload the APK file delivered by TikiLIVE developer into the ticket
6. Confirm that the version and release comments are properly filled in
7. Click on Submit
8. Review the new release details and click to submit the release to the Play Store
Example of new release details: “fix minor bugs and improvements”
Usually it takes a couple of hours for the new release to be available in store.
Google play requires a minimum of two and a maximum of eight screen shots for an application. They will be displayed on an application’s details page in Google Play.
The specs for screen shots are:
24 bit PNG or JPG with no alpha channel
320w x 480h or 480w x 800h or 480w x 854h. Landscaped images will be cropped.