After you logged into your admin account, click on Merchant Setup link from the menu:

Once the page opens, you can see all available merchants on the platform:

Click on the name of the merchant or in the Edit icon in order to configure the merchant settings:
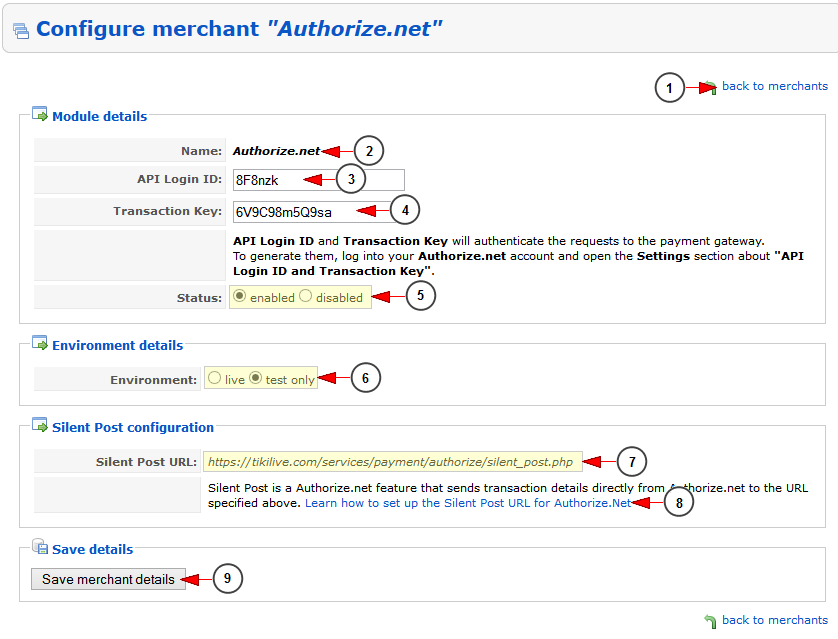
1. Click here to go back to merchants list.
2. Here you can view the name of the merchant that you are editing.
3. Insert here the API login key provided in your Authorize.net account.
4. Insert here the Transaction key provided in your Authorize.net account.
5. Check the YES radio button to enable the status of the merchant or the NO radio button to disable the status of the merchant.
6. Check the Live radio button to enable the merchant on the live platform or the Test only radio button to enable the merchant only for testing purposes.
7. Here you can see the silent post URL.
Note: the silent post URL is the address where you receive a transaction response for each payment submitted in a subscription.
8. Click here to see more details on silent post URL functionality.
Note: this section is only for testing purposes; it allows the admin to test the recurring payments. The admin can only test this settings on users who never had an active subscription.
9. Click here to save the merchant details.