The website administrator can manage the Channel Categories for the TikiLIVE platform. In order to do that you need to click on Channel Categories link from the menu:
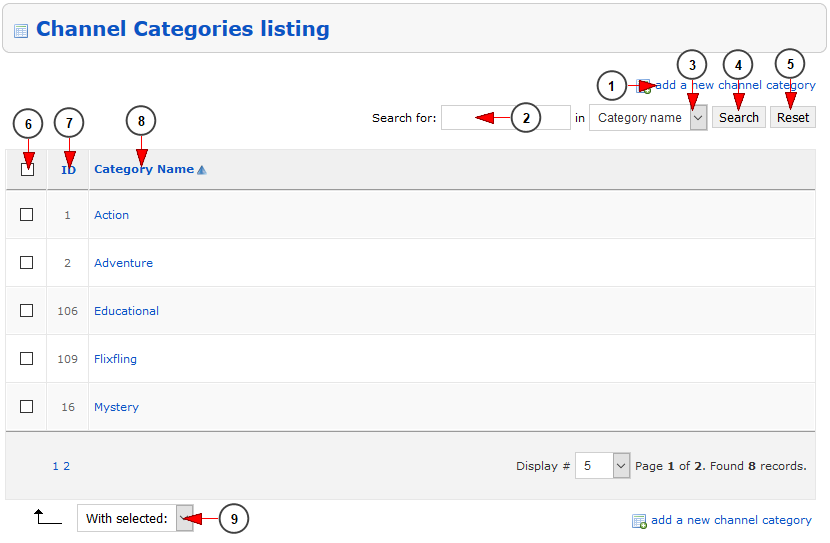
On the Channel Category page you can manage the categories that the users can assign to the channels that they will publish:
1. Click here to add a new channel category
2. Enter here the term that you want to search for
3. From the drop-down menu select where you want to perform the search: Category Name, Category ID
4. Click here to perform the search on channel categories listing
5. Click here to reset the search filter for the channel category
6. Check this box if you plan to make the following actions on the channel category: Publish in Apps, Remove from Apps, Delete, Set as Network Root Category, Unset as Network Root Category, Set as Default Category
7. Here you can view the ID of the channel category
8. Here you can view the name of the channel category – clicking on it you can edit the channel category
9. From the drop-down menu select the action that you want to apply to the video category: Publish in Apps, Remove from Apps, Delete, Set as Network Root Category, Unset as Network Root Category, Set as Default Category
You can add a new channel category and we will explain how to do that:
1. Enter here the name for the new channel category
2. Click here to upload the image for this category
3. Click here to save the category details
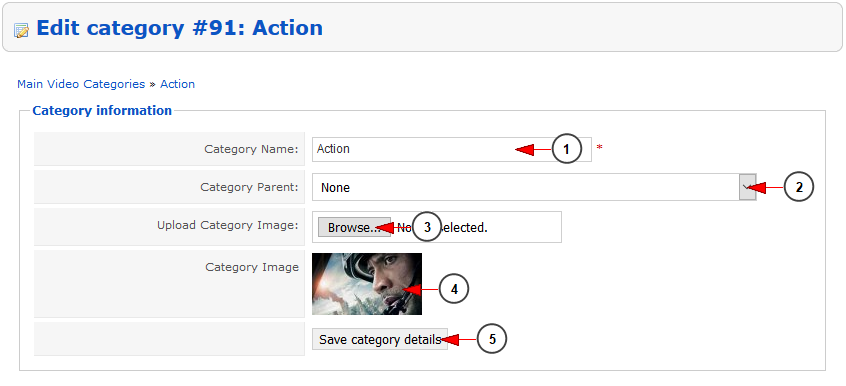
If you selected to edit the channel category then you will land on the following page::
1. Here you can view and modify the name of the channel category
2. Select from the drop-down menu the category parent for this category
3. Click here to upload a new image for this category
4. Here you can view the actual image that is assigned to this category
5. Click here to save the category details


