You will need to download the installer version of FileZilla which is the safe and easy to use:
With this version you only need to download the file, run it and the program will get installed by itself.
However, if you don’t have sufficient rights to install programs on the computer you are using the zip version is the way to go.
The goodies of this program include resume for both uploads and downloads, timeout detection, SSL, SFTP, firewall support and many others, and for easier and faster operation, you have full drag and drop support, of course.
Note: if you want to upload/download a Zip file from the FTP, make sure that your unarchiver tool does support ZIP files. Otherwise the archive cannot be opened/explored/unarchived.
Before using FileZilla, you have to configure your firewall to allow incoming connections on the ftp port (default: 21), as well as allowing outgoing connections from the server.
Installing on Windows
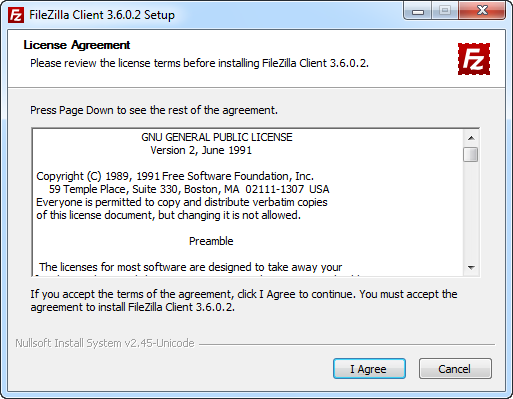
A screen will be displayed where you will have to accept the terms of the license agreement to continue. Read through it and click “I Agree” if you do.
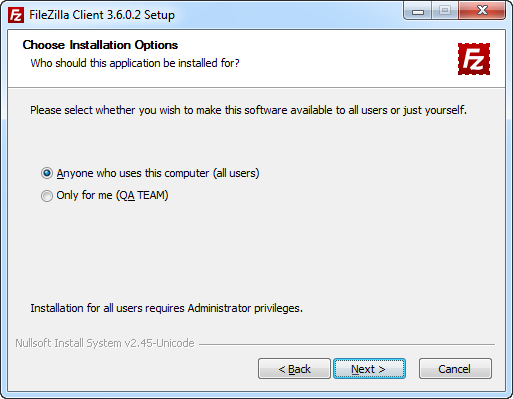
Select if the application will be available only to current user or to all users that use the computer
Next you need to choose which parts of the FileZilla client you want to install. If you hover your mouse over a choice, FileZilla will show you a description of the item. Here is the window:
Go through all of them and just check/uncheck the stuff you want. I would recommend getting the English or French documentation, additional languages if you want FileZilla in another language than English, Start Menu Shortcuts and Desktop icons for easy access to the program after it’s installed and then finally debug files which like I said can help fix problems with program bugs/crashes. So I basically recommend going for the “Standard” type of install, installing everything except the source code which is just for the advanced user who knows if he wants it or not 
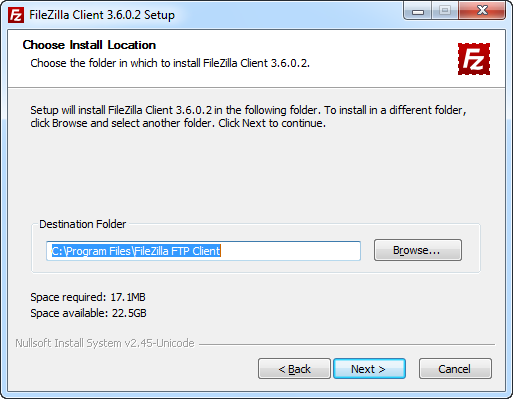
The next window will ask you where to install the program. If you don’t have any special needs, click Next.
TIP: If you want to put your FileZilla installation on a usb stick or some other kind of portable storage, you can specify to install FZ to that location here. But you need to use the xml file for storing FileZilla’s settings so that they also get transferred when you use the usb stick on another computer. You can specify this later in the installation process..
Regardless if you chose to install the start menu shortcuts or not, you will be asked what you want to name the folder with the shortcuts to FileZilla inside. The default name “FileZilla” should be good for most people. You can also choose not to install these shortcuts
When you click Next, FileZilla will get installed. If no errors occur it should complete in some seconds.
When it’s done, click Close to finish the installation.
Congratulations, you’ve now successfully installed the FileZilla application. Check the “Start FileZilla now” box to start the program after pressing the “Finish” button.
Using FileZilla
You can start FileZilla by double-clicking the filezilla.exe file (default location: “C:Program FilesFileZillafilezilla.exe”) or one of the shortcuts on the desktop or in the start menu that you may have created during the installation of FileZilla.
he application request you to report all the bugs that you will see while using the software. This is optional and will help the programmers to build a better application.
Using the Quick Connect bar
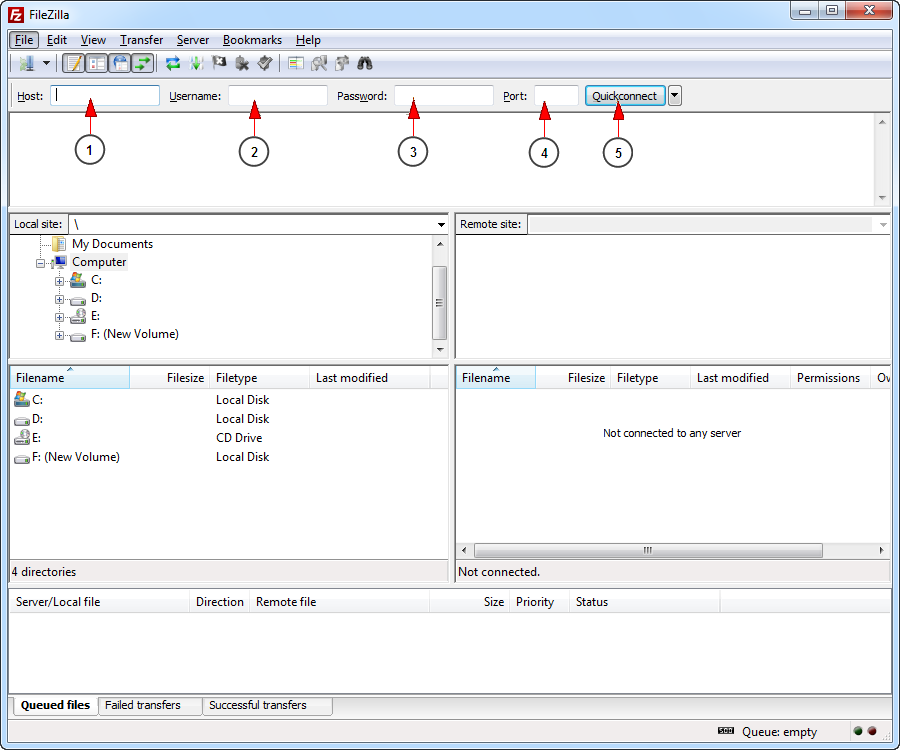
To connect to an FTP server, enter the address of the server into the host field of the Quickconnect bar (i.e. domain.com – see image below). If it is a special server type like an SFTP server, add the protocol in front of the address. In case of an SFTP server, start the address with ‘sftp://’ (i.e. sftp://domain.com). Enter the port of the server into the port field if it is not the default port (21 for FTP, 22 for SFTP). If a username / password is required, enter it in the corresponding fields, otherwise the default anonymous logon will be used. Click on Quick connect or press Enter to connect to the server.
1. Insert here the host address
2. Insert here the username
3. Insert here the password
4. Insert here the port number
5. Click here to connect
Please notice that the Quick Connect is for… quick connections – so there is no way to edit the quick connections list which stores the last 10 entries. To store FTP server names you should use the Site Manager, instead.
Quick Connect is good for testing the login info before making a site manager entry. Once you connect, you can choose File -> “Copy current connection to Site Manager…” to make a permanent entry. It is usually best to check your login info with Quick Connect before making a permanent entry.
Using Site Manager
You can access Site Manager from File tab
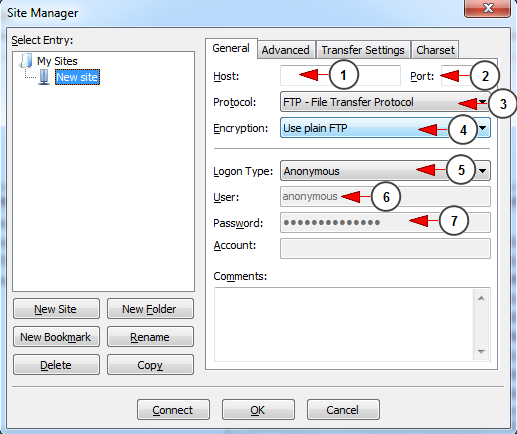
1. Insert here the host address
2. Insert the port number
3. Select the server type as FTP
4. Select the encryption plain FTP
5. Select the logon type as Normal
6. Enter here your username
7. Enter here your password
Use the Select Entry field to select the target site. Once selected you may either Connect to , Edit, Copy, Rename, or Discard the site.
You may also organize the sites you can refer to using FileZilla, by introducing a complete folder structure. Use the New Folder button to introduce or add folders.
In the edit section, several tabs are available for detailed information about the FTP location.
- Generaldescribes the hostname, the Port number, the type of FTP server you will connect to (such as FTP or SFTP), the type of login that will take place, when appropriate, the user ID to use when connecting, optional the password required, optional the account information needed and finally some space to make comments about the site. Logontypes:
- Anonymous: You can’t enter a username and password. In this case the username always is anonymous.
- Normal: You have to enter a username and if required, a password.
- Ask for password: FileZilla asks you the password during logon and it remembers the password during the session.
- Interactive: FileZilla asks for the password … and asks again for every new connection to the server.
- Account: Selecting this enables the “Account” field in the bookmark’s settings. This account type is for FTP only, SFTP does not have support for it.
- Advanceddescribes several advanced functions.
- Servertype allows you to make a special selection for this FTP target. Most sites will work fine with the Default value, however some will require SFTP.
- Bypass proxy Allows to bypass any proxy server.
- default local or remote directory fields allow for specific starting settings when activating a connection.
- Finally Time Zone Settings Allows to interpret time zone values for the FTP server different from its real settings.
- Transfer Settings specifies in more detail how transfer may take place.
- Charset specifies the character set used to communicate with the targeted FTP site.
Navigating on the server
After a successful connection attempt, a list of files and folders appears on the right side of the main window. The current folder is listed in the edit field on the top. Below you will see the remote directory tree and below that, the contents of the current remote folder. There are three ways to change the folder. First, you can double-click a folder in the file list. Second, you can change the current folder by clicking a folder in the directory tree. Last but not least, you can always enter the folder name into the edit field and press enter. You will notice a folder called “..” displayed in virtually all directories. This folder allows you to go up to the parent directory of the current folder.
1. Here are listed the folders from your computer
2. Here are listed the folders form the server to which you connected
Navigating on your machine
Navigating on your machine works almost like navigating on the server. The current local folder and the local directory tree are displayed on the left side of the main window by default.
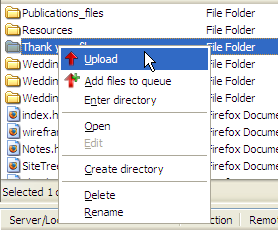
You can upload or download a file by double-clicking on it. It will be added to the transfer queue and the transfer starts automatically. To transfer folders and/or multiple files, select them and right-click the selection. Then you can click on Upload/Download in the popup menu.
You can also drag the files from one side and drop them on the other side. To add files to the queue so that they will be transferred later, select them and click Add to Queue from the popup menu. You may also drag the files directly into the queue. Click on Transfer -> “Process Queue” to start transferring the files added into queue.
Or, you can click on a file, then drag the file (a box is added to the arrow cursor) to the folder where you want to move it. The folder will be highlighted when you are over it. Let go of the mouse button and the file will be moved to the folder.
Deleting files/directories from server
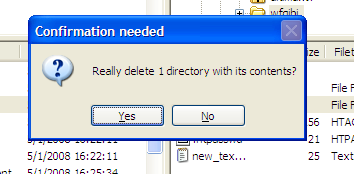
Select the file fromt he server that you want to delete and right-click on the selected file and choose Delete option from the menu.
You will be asked to confirm the delete operation.
Disconnecting from server
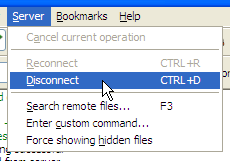
In order to disconnect from the server go to Server -> “Disconnect” and the connection with the server will be closed.

