In this manual page we will explain how the system administrator can manage the dealers from the TikiLIVE platform.
First he needs to login on admin area and navigate to All Dealers page:
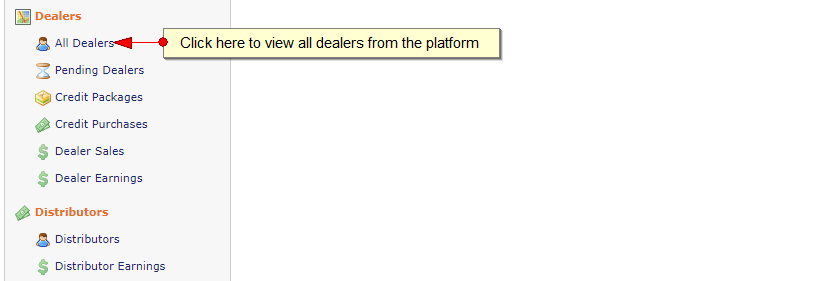
On the dealers listing page click on add new dealer link:

On the Add dealer page insert the details of the new dealer account that you want to create:
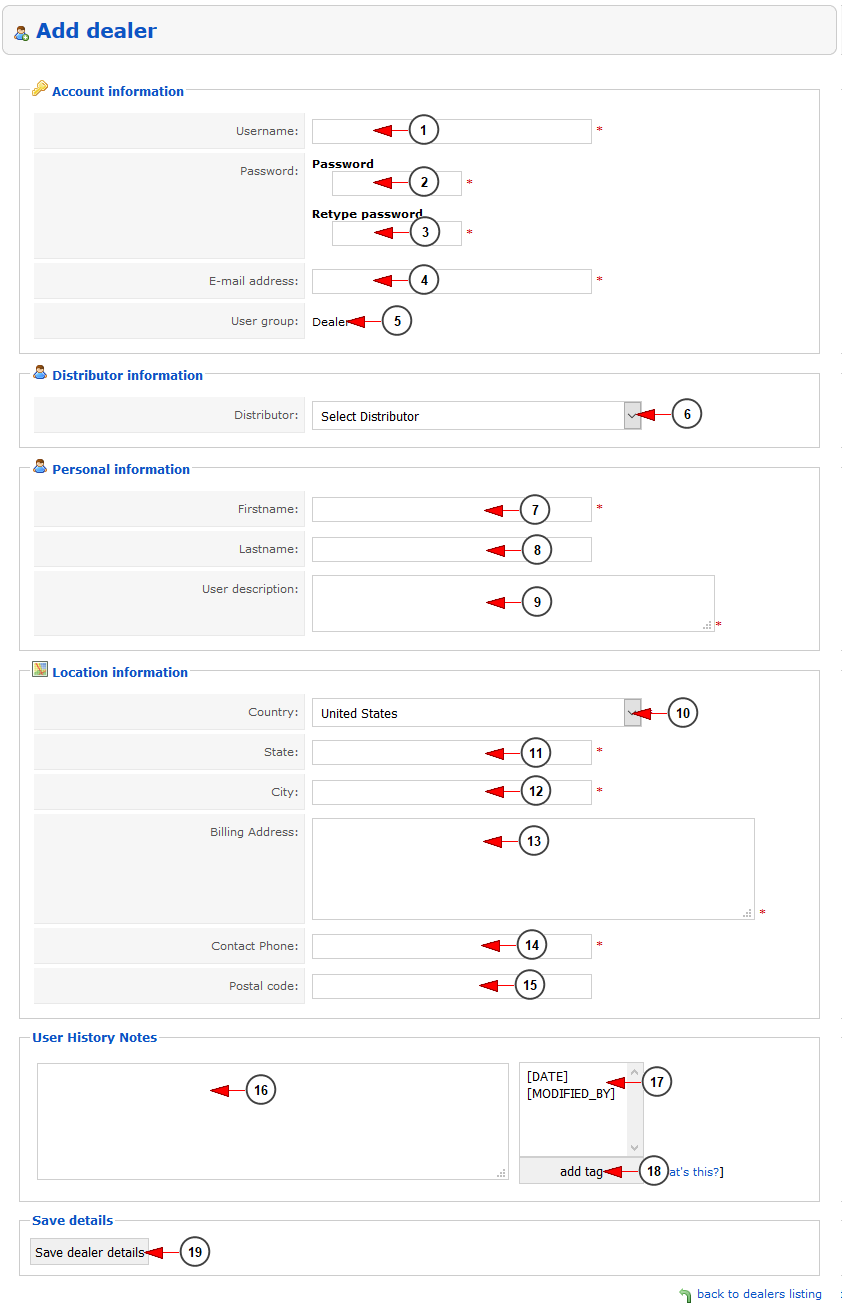
1. Enter here the username of the dealer
2. Enter the password for the new dealer account that you want to create
3. Re-enter the password for the new dealer account that you want to create
4. Enter here the email address of the new dealer account that you want to create
5. Here you can view the group to which the account will be added
6. Select from the drop-down the distributor to which you want to assign the dealer
7. Enter here the first name of the dealer
8. Enter the last name of the dealer
9. Enter here the description for the dealer user that you want to create
10. Select the country where the dealer lives
11. Enter the state where the dealer lives
12. Enter the city where the dealer lives
13. Enter the billing address for the dealer
14. Enter the dealer contact phone number
15. Enter the postal code of the address where the dealer lives
16. Here you can enter the history notes for this dealer – these are internal notes available only to administrators
17. From here you can use the history notes tags – these are internal notes available only to administrators
18. Click here to insert the history tags
19. Click here to save the new dealer user
Once the dealer is added on the platform you can see it listed on the Dealers listing page:
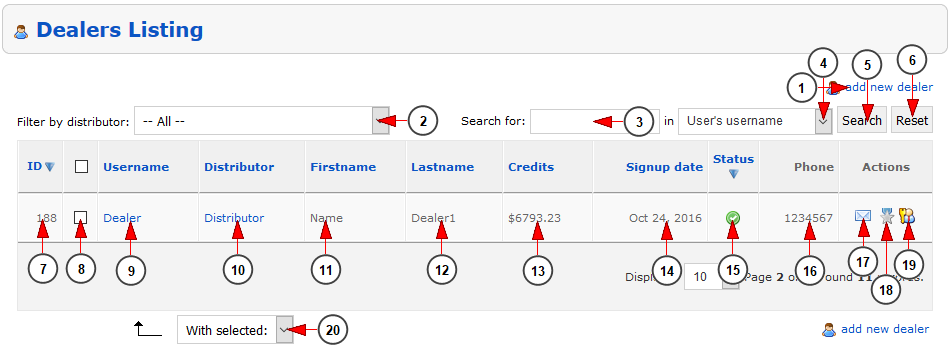
1. Click here to add a new dealer
2. From this drop-down you can filter the dealers listing and see the ones assigned to a specific distributor
3. Enter here the term you want to search – the search will be done on the: user’s username, user’s email address, user’s name, user’s phone number, user ID, user’s IP address
4. Select from the drop-down where you want the search to be performed: user’s username, user’s email address, user’s name, user’s phone number, user ID, user’s IP address
5. Click here to perform the search
6. Click here to reset the search results
7. Here you can view the dealer ID
8. Check this box if you want to enable or disable the dealer account
9. Here you can view the username of the dealer – clicking on it you will edit the dealer
10. Here you can view the distributor to which this dealer is assigned
11. Here you can view the first name of the dealer
12. Here you can view the last name of the dealer
13. Here you can view the credits that the dealer has on his account
14. Here you can view the date when the dealer registered (or was manually added by admin) on the platform
15. Here you can view the status of the dealer account
16. Here you can view the dealer phone number
17. Click here to send an email (using default email program from your PC) to the dealer
18. Click here to edit the limits and permissions for the dealer
19. Click here to login on the dealer account
20. Select from the drop-down if you want to enable or disable the dealer account