On the Channel details page you can edit the title, description, thumbnail and category of the selected channel.
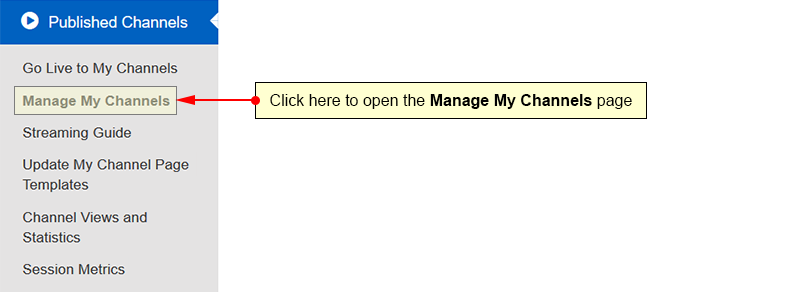
Click on the Manage My Channels link, under the Published Channels section:
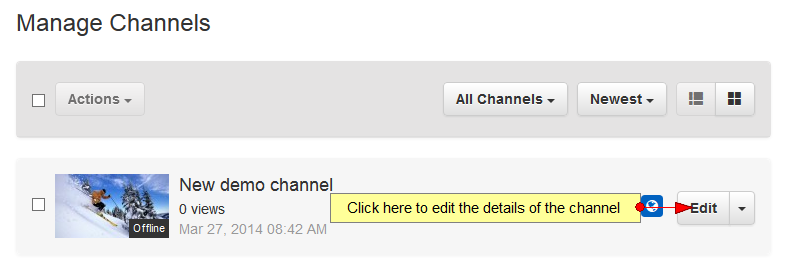
On the Manage Channels page, click on Edit button for the channel you want to edit:
The edit channel details page will open and you can edit the general details of the channel:
1. Here you can see the number of views for the channel.
2. Here you can see the number of comments on the channel.
3. Here you can see the number of tickets sold.
4. Click here to play the channel.
5. Click here to view the channel public page on the website.
6. Click here to view the channel URL in order to share it. A new overlay window will open displaying the video URL.
7. Click here to view the channel statistics. You will be redirected to the Statistics page.
8. Click here to delete the channel.
9. Click here to open the Channel Details section.
10. Click here to edit the channel publishing details.
11. Click here to edit the channel options and privacy.
12. Click here to edit the channel map location.
13. Click here to edit the channel looping content.
14. Here you can view and edit the channel title.
15. Here you can edit the url for your channel. Initially, this will auto-fill based on the channel name, or you can edit it to a custom slug.
16. Enter here the description for your channel.
17. Click here to browse an image on your computer in order to select it as the channel thumbnail.
18. Here you can see the current channel thumbnail. The image should be a valid jpg file with the minimum dimensions of 540px width and 304px height, and an aspect ratio of 16×9.
19. Click here to browse an image on your computer in order to select it as the channel poster.
20. Here you can see the current channel poster. Recommended dimensions are 1920px width and 1080px height, and an aspect ratio of 16×9.
21. Click here to browse an image on your computer in order to select it as the channel colored logo.
22. Here you can see the current channel colored logo. The image should be a valid png file with the dimensions of 1920px width and 1080px height, and an aspect ratio of 16×9.
23. Click here to browse an image on your computer in order to select it as the channel white logo.
24. Here you can see the current channel white logo. The image should be a valid png file with the dimensions of 540px height and minimum 540px to maximum 2700px width.
Note: There is a cache of about 3 hours until thumb is displayed on the channel.
25. Click here to select a category to which you want to attach the channel.
26. In this section you can see the channel tag categories. Select a category to list the categories under it.
27. Check the desired boxes to select the tags for the channel.
28. In this section you can enter the custom tags for this channel. Separate each tage with a blank space.
29. Here you can see the date when the channel was created.
30. Click here to save the channel details.
Share channel
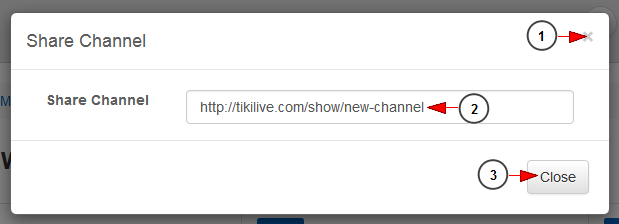
When you click on Share button an overlay window will open, and you can see the URL of the channel:
1. Click here to close the overlay window.
2. Here you can see the URL of the channel. You can copy it.
3. Click here to close the overlay window.


